Entry of
How to knit mittens on double-pointed needles
A mitten is a tube with a thumb attached. Everything difficult about it happens in three places: the join, the gusset and the tip.
Mittens are the usual first project in the round, and the reason is arithmetic: they are small enough to finish, big enough to see, and every technique they use reappears in socks, hats and sleeves. Worked on double-pointed needles they need no special equipment beyond a set of five short needles.
What the needles are doing
A set of double-pointed needles holds the round open. With five needles, the stitches are divided over four and the fifth does the knitting; with a set of four, the stitches sit on three. Five needles is easier for a mitten because each needle holds fewer stitches and the tube keeps its shape. For mittens, needles of 15 to 20 cm (6 to 8 in) are comfortable; longer ones knock against the hands.
Two alternatives make the same fabric with the same numbers: magic loop, on one circular needle with an 80 to 100 cm cable, and two shorter circulars. Nothing below changes if you use them.
The measurement everything comes from
Measure the hand around the palm, above the thumb, with the thumb tucked against the hand. Wool stretches, so the mitten should be slightly smaller than the hand: about half an inch (1 cm) of negative ease for a snug fit, none at all for a loose one.
Multiply that target circumference by your stitch gauge, then round to a multiple of four so that a two by two rib works out. Swatch in the round if you can, because most knitters purl at a different tension from their knit stitches and a flat swatch will lie to you about a tube.
| Yarn weight | Typical needle | Stitches per inch | Cast on | End the gusset near |
|---|---|---|---|---|
| Fingering (1) | 2.5 to 3 mm | 7 to 8 | 56 to 60 | 19 to 21 sts |
| Sport (2) | 3.25 to 3.5 mm | 6 to 6.5 | 48 | 15 to 17 sts |
| DK (3) | 3.75 to 4 mm | 5.5 to 6 | 44 | 15 sts |
| Worsted (4) | 4.5 to 5 mm | 4.5 to 5 | 36 to 40 | 13 to 15 sts |
| Bulky (5) | 5.5 to 6.5 mm | 3.5 to 4 | 28 to 32 | 11 sts |
Casting on and joining without a twist
Cast every stitch onto one needle, then slide them across the others. Lay the work on the table and check that the cast-on edge runs in one unbroken line, with all the bumps facing the same way, before the first stitch of the first round. A twist is only fixable by casting on again, and it will not become visible until several rounds later.
Knit the first stitch firmly, pulling the working yarn tight, to close the ring. The cast-on tail marks the beginning of the round, which saves a stitch marker.
Ladders between the needles
A ladder is a loose vertical line where one needle ends and the next begins. It happens because the last stitch on one needle and the first on the next are held further apart than the stitches inside a needle, so the yarn between them spans a longer distance.
- Knit the first two stitches of every needle firmly, not just the first.
- Move the boundaries: every few rounds, knit one or two extra stitches onto the working needle so the junction never falls in the same column twice.
- Use five needles rather than four. Four junctions spread the strain better than three.
- Do not knit the first stitch of a needle with the needle held vertically; keep both needles roughly parallel.
Cuff, then hand
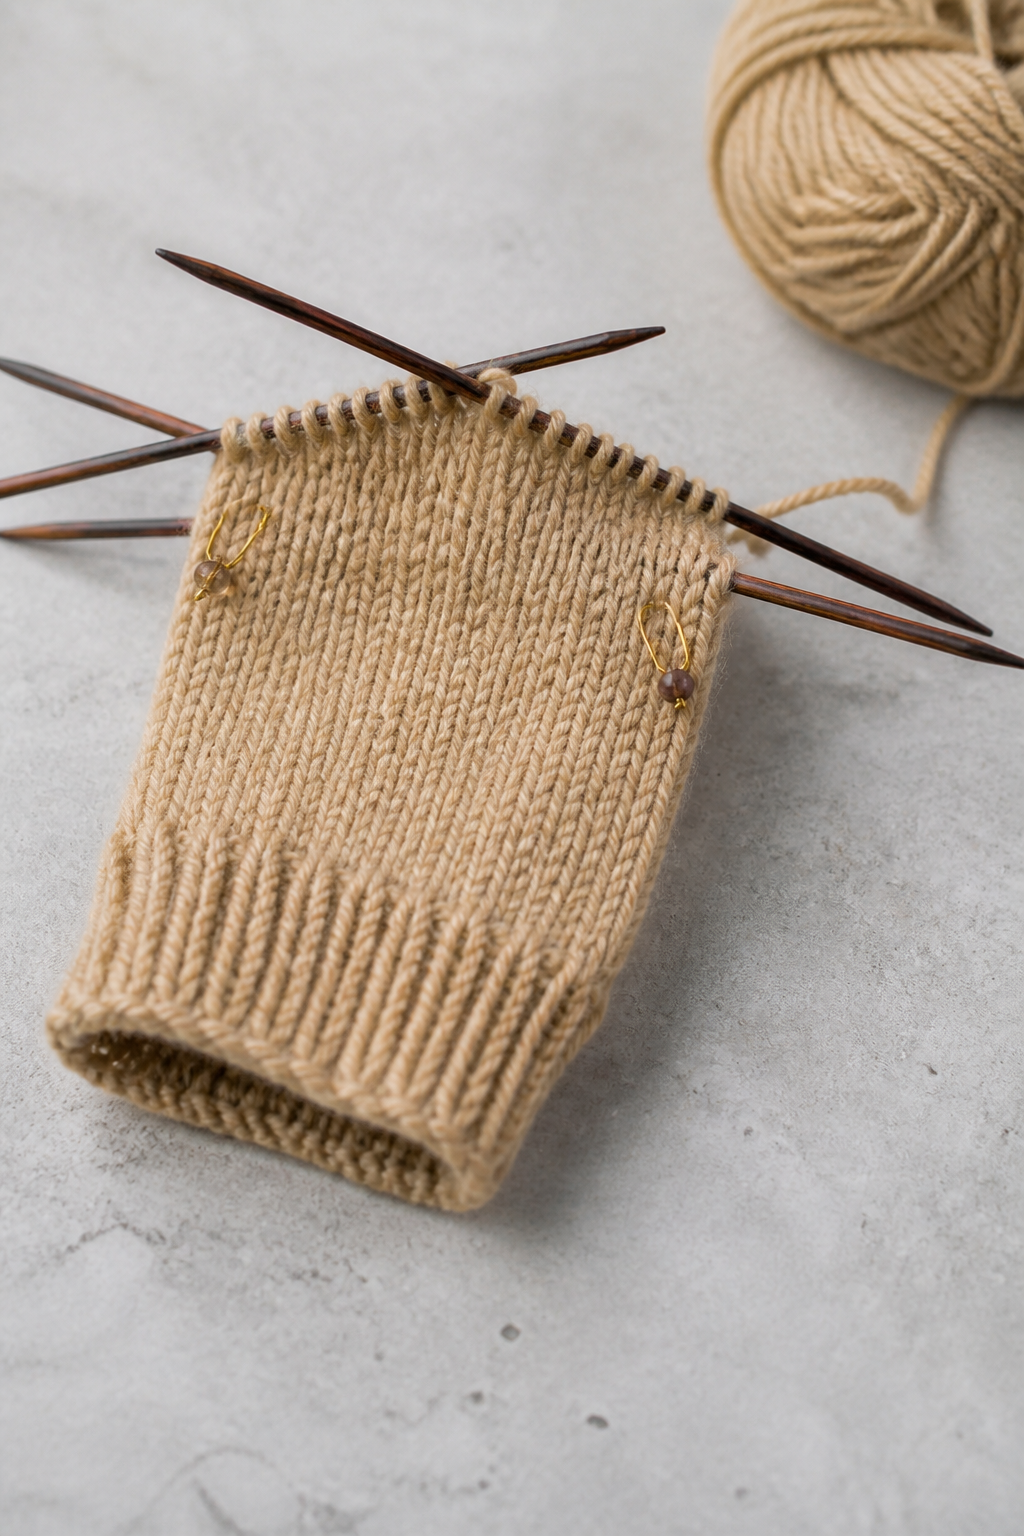
Work a two by two or one by one rib for 2 to 3 inches (5 to 7.5 cm). Ribbing is what keeps snow out and the mitten on, so it is worth more length than feels necessary. Then change to plain knitting, every round knit, and work about an inch, or until the fabric reaches the crease at the base of the thumb.
The thumb gusset
The gusset is a triangle of extra fabric that lets the hand widen where the thumb leaves it. Place two markers with one stitch between them, on the palm side, a few stitches in from the side of the hand.
- Increase round: knit to the first marker, slip it, make one right, knit to the second marker, make one left, slip it, knit to the end. Two stitches gained.
- Work one plain round.
- Repeat those two rounds until the stitches between the markers reach the number in the table above, roughly a third of the original round.
- Slip the gusset stitches onto a length of smooth waste yarn and tie its ends. Do not use a stitch holder heavier than the mitten.
- Cast on one or two stitches over the gap with a backwards loop, and carry on in the round at the original stitch count.
The second mitten is mirrored simply by placing the markers on the other side of the round. Knitting both mittens identically is also fine: the fabric has no front or back and the pair will fit either hand.
Length, then the tip
Keep knitting plain rounds until the mitten reaches the tip of the little finger. That is the point to start decreasing, and it is measured on the hand rather than taken from a table, because hand length varies far more than hand circumference.
Put a marker at each side of the mitten, dividing the round in half, and work this decrease round: knit one, slip slip knit, knit to three stitches before the marker, knit two together, knit one; repeat once. Four stitches gone per round. Alternate a decrease round with a plain round until half the stitches remain, then decrease every round until eight or twelve are left. Cut the yarn, thread it through the remaining stitches with a tapestry needle, pull tight and fasten off inside.
The thumb
Slide the parked stitches back onto two or three needles. Pick up the stitches cast on over the gap, plus one extra stitch in each corner where holes form. Knit in the round until the thumb reaches the middle of the thumbnail, decreasing the corner stitches away in the first two rounds. Then knit two together all the way round once or twice and draw the yarn through the rest.
Corner holes are the one place mittens leak. Picking up an extra stitch and decreasing it away next round closes them properly; sewing them shut afterwards leaves a lump.
Yarn for mittens
Mittens are handled, dragged along walls and dropped in snow, so a hard-wearing yarn earns its place: a firmly plied wool, or wool with a little nylon. Superwash wool is convenient and slightly less warm because it has lost some of its scales. Everything on the ball band that matters here is set out in the entry on reading a yarn label.
Once the mitten is finished, soak it and dry it flat rather than on a radiator, the same way as any wool garment. The stitches around the gusset in particular settle into place only after a wash.